
Flashing Firmware to ARM Cortex-M Microcontrollers using OpenOCD
Thursday, February 14, 2019 Posted in Embedded SystemsTags : arm cortex-m openOCD tm4c microcontrollers linux
Althought it is relatively easy to compile code as a part of a build system for your ARM microcontroller using GCC and Make, It is much more confusing about which toolchain to use to flash a firmware binary
to your microcontroller, and debug it.
The Segger J-Link seems to be the preferred product, as it is a hardware programmer( i.e flasher/burner ) that is vendor-independent i.e works with many different microcontrollers from various manufacturers and also serves as a debugger, It is also Linux compatible, which adds to its popularity, altough it is expensive( the base model starts at $200 ), and the J-Link EDU altough cheaper, are not cheap enough for those simply starting out writing firmware, also, these J-Link EDU variants come with other restrictions.

On the other hand, most Microcontroller Evaluation boards come with an inbuilt hardware programmer/ICDI chip on board, but these can only be programmed using tools exclusive to Windows or even just certain IDEs, there are community made flashing programs for Linux, but these are only for some microcontroller families
Luckily, we have OpenOCD to the rescue,which uses the On Chip Debugger on most microcontroller boards to both flash and debug ARM microcontrollers.However, there is sparse and scattered documentation about how to use it, which is why i have written this guide.
What is OpenOCD?
OpenOCD is a program that when installed on a Linux system can be used to connect to a Microcontroller to flash and debug it, using either purpose built debug adapter hardware like a Bus Pirate or Olimex ARM-OCD-H, or vendor supplied ICDIs like ST-Link etc
It provides a GDB server than can be connected to for debugging, and a Telnet server that can be used to pass OpenOCD commands for Flashing,OpenOCD also supports a wide variety of microntrollers for debugging and flashing
Note : The TM4C123GXL evaluation board is being used for the purposes of this guide, but other well-known ARM microcontrollers like STM32 + attached ICDI debugger can also be used.
Installing OpenOCD
First, we need to download and install OpenOCD.
We need to get the pre-requisite packages first
sudo apt install libusb-1.0-0 libusb-1.0-0-dev libtool pkg-config autoconf automake texinfo
Next, we clone the source code of OpenOCD, which we need in order to build and install it
git clone git://git.code.sf.net/p/openocd/code openocd.git
cd openocd.git
Now we run bootstrap and config scripts with our needed options
Both the --enable-stlink and --enable-ti-icdi options here are specified to include support for these two ICDI’s in your openOCD install, altough i have seen these features being activated automatically also
./bootstrap
./configure --prefix=/usr  --enable-stlink
--enable-ti-icdi
Finally we run make to build OpenOCD and sudo make install to install it.By default it is installed to /usr/local/bin/openocd
make
sudo make install
Flashing Using OpenOCD
After the installation, connect your micrcocontroller evaluation board( or your eval board + its hardware programmer like an st-link ) to your PC, and run this line
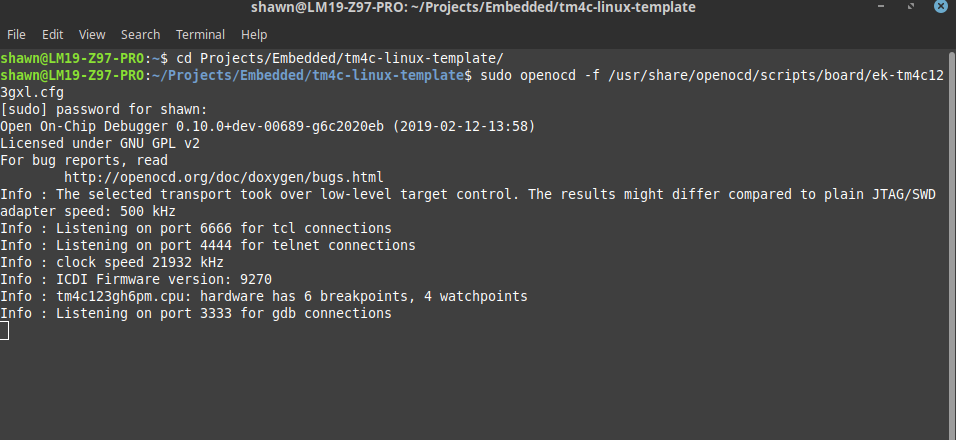
sudo openocd -f /usr/share/openocd/scripts/board/ek-tm4c123gxl.cfg
Here you start openocd by specifying it a config file of your microcontroller board, mine is the TM4C123GXL so i used the ek-tm4c123gxl.cfg file.
You should be greeted with this output
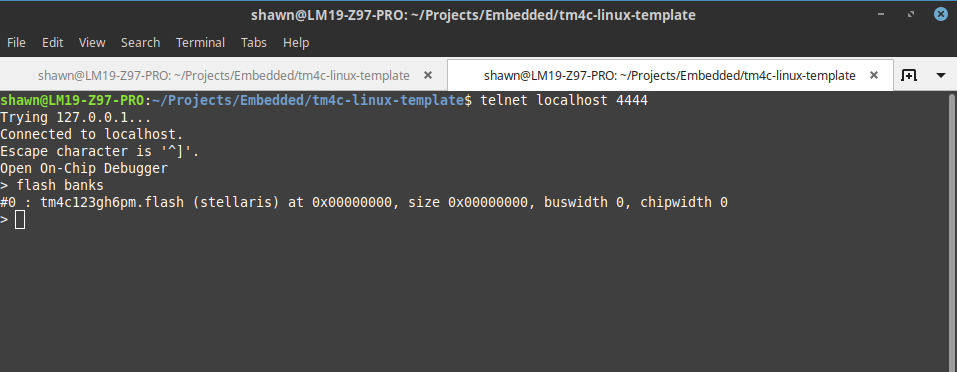
Now open a new terminal tab or window and connect to the Telnet OpenOCD server by
telnet localhost 4444
You will now be able to give commands to OpenOCD using this prompt

You then run the flash banks command to list your microcontroller’s flash starting point, in my case it is 0x0000000
> flash banks
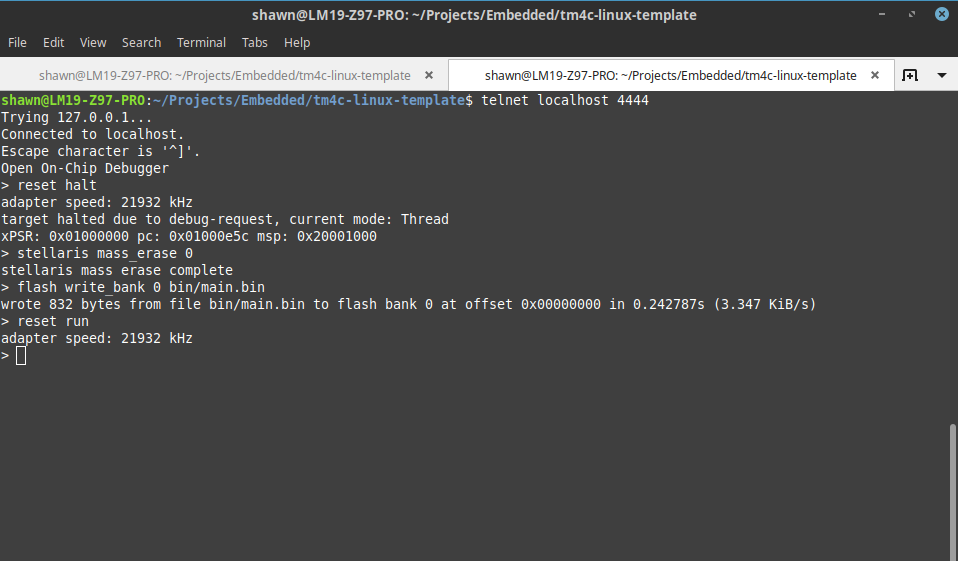
Next we have to halt our microcontroller, without which it can’t be flashed
> reset halt
Then we need to erase the contents of its flash by
> stellaris mass_erase 0
Here, stellaris is a driver command, different for each microcontroller family or brand, you should put your microcontroller driver’s command here instead of stellaris if you use a different microcontroller/ eval board
You can find the flash driver commands for your board here on this OpenOCD docs page.
mass_erase is the command used to erase the flash, and 0 is the location of the flash that we found from flash banks
Next, we flash our board or MCU with our firmware binary, again here 0 is the start of the flash, and main.bin is the binary to be flashed,the path to your binary is relative to your current directory, so if you want you can enter the full path to it from your home folder if you are in a different directory
> flash write_bank 0 main.bin
Finally we reset our board to run our program
> reset run
Flashing in a single command
Alternatively, all the flashing can be done in this single, succinct command
sudo openocd -f /usr/share/openocd/scripts/board/ek-tm4c123gxl.cfg -c "program bin/main.bin reset"
the -c option allows you to specify commands to openOCD like "program bin/main.bin reset" in this case, where program bin/main.bin tells OpenOCD to flash main.bin to the board, and reset tells it to reset the board
you can also specify an exit command to make openOCD exit after it has finished flashing, else it will start a GDB debug server after it is done, and will be active in the current terminal
You have to use Ctrl + D to quit OpenOCD, this will also shut down the GDB server