How WSL2 and VSCode Make Windows 10 the Best OS for Software Development
Friday, March 12, 2021 Posted in GeneralTags : Linux misc Windows WSL
In this post, we will setup VSCode along with WSL2 to create the perfect development workflow, negating the need for dual-booting a Linux distro.
For many years Web Development was a painful experience on Windows, since all the industry standard tooling like compilers, runtimes, package managers, version control software and even shell utilities were built with and used with a Linux or Unix distribution in mind, causing developers to either spend a long time setting up and fixing disparate utilities and tooling for their Windows system or using bulky, unintuitive and resource heavy IDEs.
Or even switching to dual booting with a Linux distro, which comes with it’s own problems of possible driver issues and lesser battery life on Laptops when compared to Windows, along with a lack of certain software products like Adobe’s Illustrator, XD or Photoshop.
But now, that has changed with the advent of WSL2 and VSCode with the “Remote - WSL” extension.
What is WSL2 and VSCode ?
VSCode is a popular “Text Editor” however packed with features that come to close to an IDE, without compromising on ease of use and the associated high resource usage.
WSL2, which stands for Windows Subsystem for Linux is a Windows feature that allows you to use Linux in Windows 10, through a lightweight VM running a full featured Linux Kernel maintained by Microsoft and a “userland” distro of your choice like Ubuntu, Fedora or OpenSUSE, this gives you a shell like Bash and total Linux compatibility from the system call level, and fast file IO performance as you would expect on a native Linux distro.
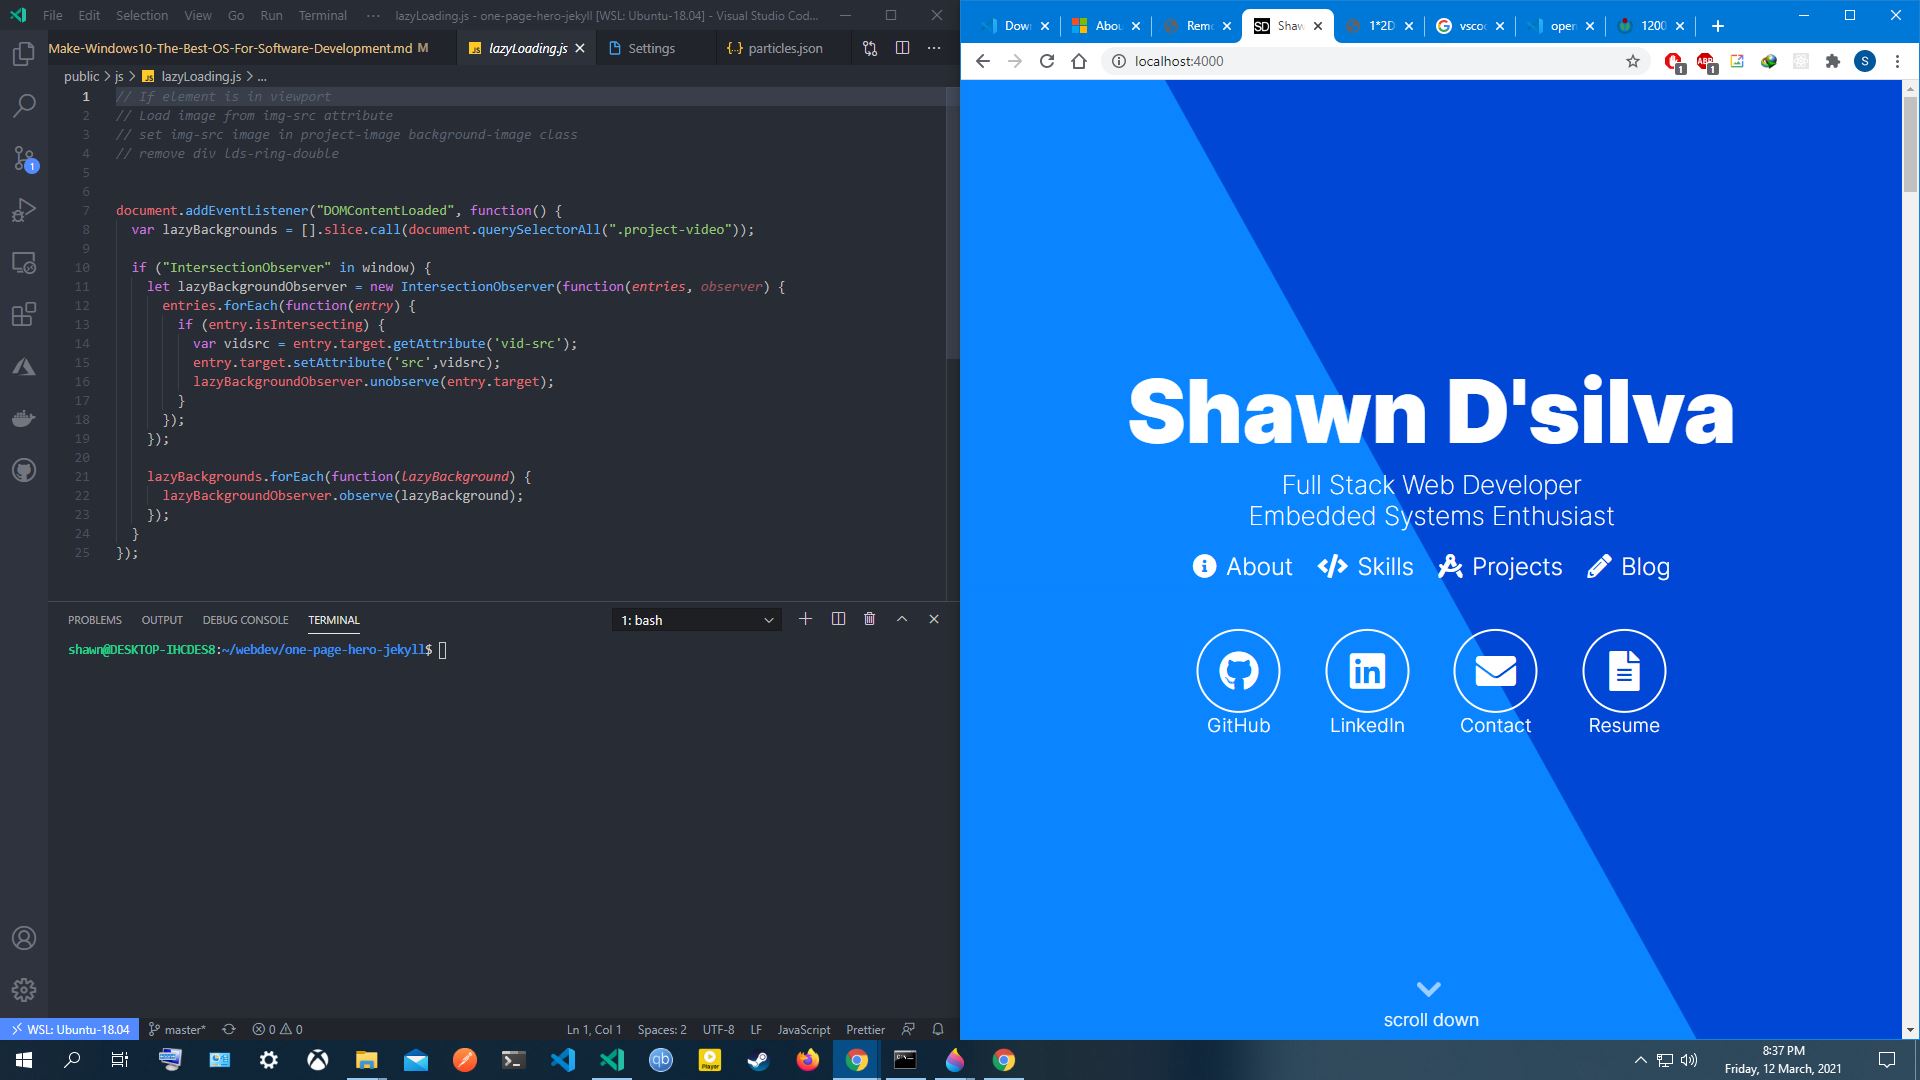
VSCode now comes with the “Remote - WSL” extension, which makes it effortless to use your Linux Distro( I use Ubuntu 18.04 ) in WSL2 with VSCode on the Windows 10 host, enabling you to edit and debug your code on VSCode, while the code is executed in the WSL2 Linux distro, and any local development server’s output on the WSL2 distro is proxied to localhost in your host Windows 10 environment, accessible through a browser like Chrome or Firefox and any Terminal based output can be seen and interacted with in the BASH shell provided by VSCode and it’s “Remote - WSL” extension.
How to Install and Setup WSL2
First you need to make sure that your Win10 installation is upgraded to it’s latest version, WSL2 needs Version 1903 as a minimum.
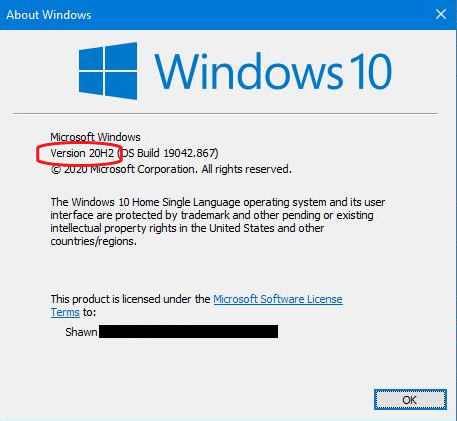
You can find your build version by pressing Windows Logo Key + R on your keyboard, and then typing winver in the Run dialog box that appears.
A window like this should appear, this shows my current Win10 version that is Version 20H2
If your version isn’t 1903 or higher, you have to update Windows 10.
- Next, open a PowerShell window as Administrator( Press Windows Logo Key + S to open Cortana/Search, enter PowerShell, right click on PowerShell and select Run as Administrator) and run the below command.
dism.exe /online /enable-feature /featurename:Microsoft-Windows-Subsystem-Linux /all /norestart - Run the below command to enable Virtual Machine Platform on your system, that is required by WSL2
dism.exe /online /enable-feature /featurename:VirtualMachinePlatform /all /norestartRestart your system after this command finishes executing.
-
Download and Install the Linux Kernel Update Package
- Set WSL2 as the default version for installing a new Linux distro
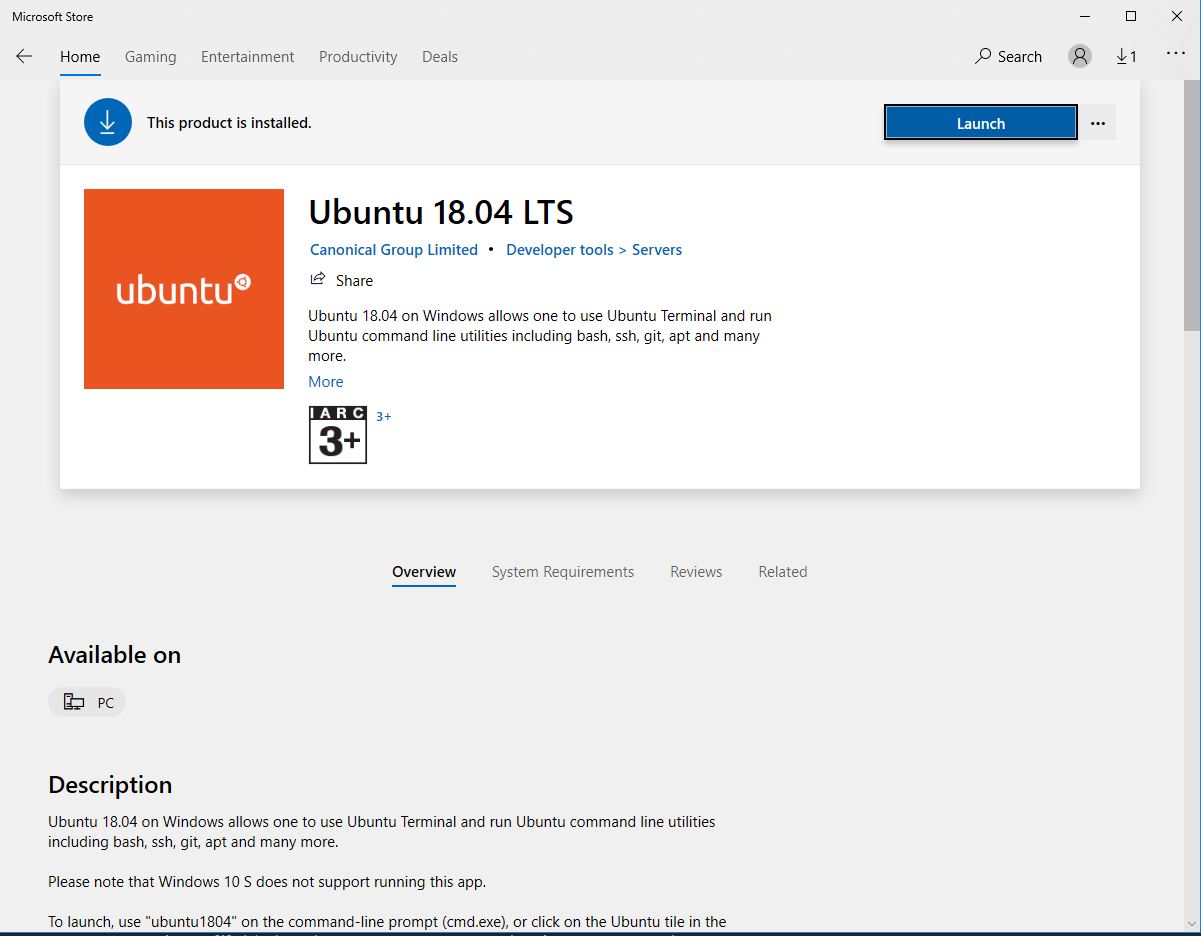
wsl --set-default-version 2 - Download A Linux distribution from the Microsoft Store , I have Ubuntu 18.04 already installed. Once your download the Distro of choice, launch it either through the Start menu or the Microsoft Store page.
Upon Launching it will take some time to setup and then ask you to enter a username and password
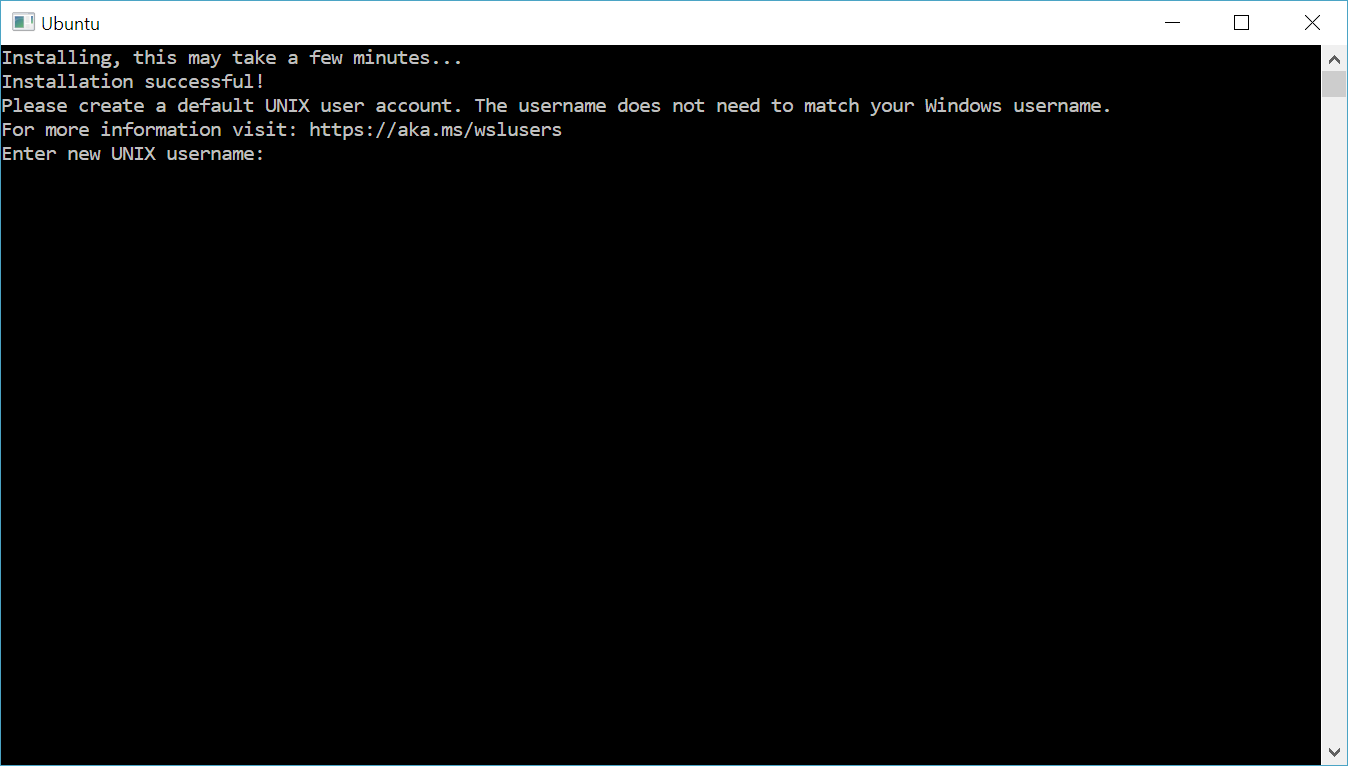
With this, the installation of WSL2 and a Linux distro is complete.
Integrating WSL2 with VSCode
This step is easy, You just need to Download & Install VSCode.
Post Installation, Open VSCode and press Ctrl+Shift+X to open the Extensions tab, search for “Remote - WSL” and install it.

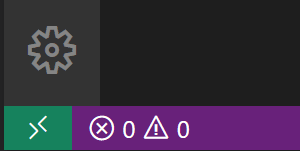
Once the Extension is installed, you will see the following icon in green( It may be colored differently depending on your theme ) in the bottom left of your VSCode window
Click on it and you will be presented with a menu like this
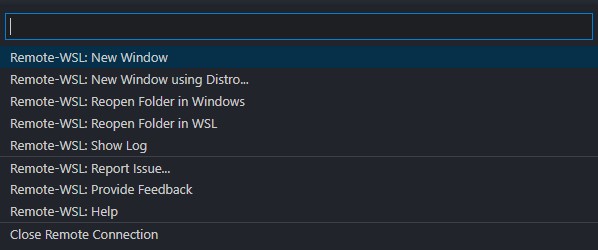
Both the options “Remote-WSL: New Window” and “Remote-WSL: Reopen Folder in WSL” will connect your VSCode instance to the default Linux distro in WSL2.
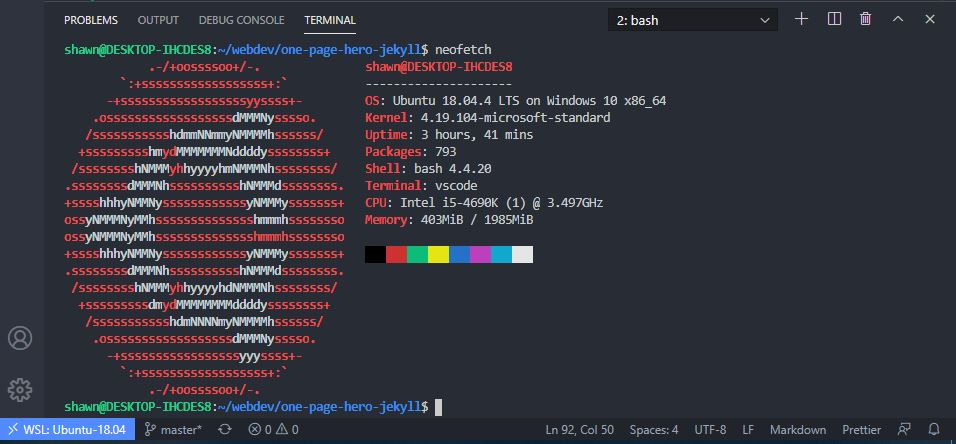
The remote button pictured below should now show your Distro name

And using Ctrl+` to open the Terminal will give you a bash shell from WSL2 instead of PowerShell or cmd.
WSL2 Caveats and Workarounds
WSL2 and It’s integrations with VSCode are still under active development, and as such there are minor niggles that you wouldn’t expect if you’re coming from a native Linux distro workflow, I will list some of these issues that I’ve encountered, and fixes to them
File Transfer
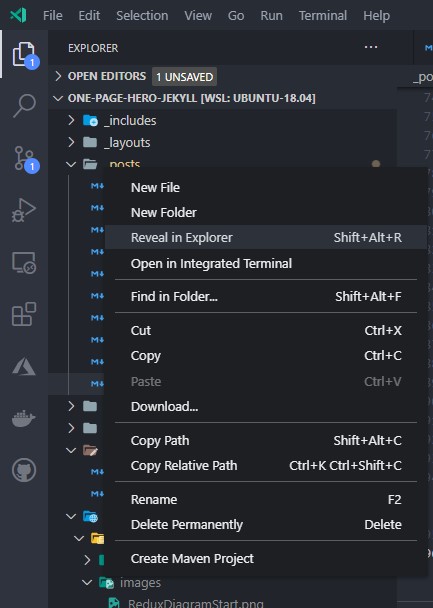
WSL2 uses it’s own filesystem, much like a VM, instead of the default Windows 10 host filesystem, but file transfer still works using either drag and drop into folders in the Explorer tab( The files icon in top Left, or open using Ctrl+Shift+E ) of VSCode, Or by right clicking on a file or directory in the Explorer pane and selecting “Reveal in Explorer”, this will open the directory in the Windows Explorer file manager.
Auto Start of Services
WSL2 sadly does not ship with a working implementation of systemd, which means you cannot make programs run on WSL2 startup.
This means for database programs like MySQL or Posgtes, you will have to manually start them up each time you start VSCode.
Fortunately, there is a hacky “fix” for this.
Open up your ~/.bashrc file in your favorite text editor, I’m using Vim, and press Shift+G on Vim to go to the end of file.
Press i in Vim, and insert the below two lines, which startup mysql and postgres respectively, press Shift + : and then x to save the file.
sudo service mysql start
sudo service postgresql start
This will start mysql and postgres and any other service you’ve made an entry for on WSL2/VSCode startup, however it will come up with an annoying password prompt every time.
We fix that by opening the sudoers file
sudo vim /etc/sudoers
And adding the following two lines to it’s end
%sudo   ALL=(ALL) NOPASSWD: /usr/sbin/service mysql *
%sudo   ALL=(ALL) NOPASSWD: /usr/sbin/service postgresql *
Then save the file, these two directives allow the mentioned programs to be run without a password by the “service” control program. Your services will now autostart successfully each time your open VSCode connected to WSL2.
Accessing Local Development Servers on different devices on the Local Network
Sometimes you want to test your Website for responsiveness on actual hardware, like an Android or iOS device, instead of just relying on the In-Browser tools. VSCode however only proxies localhost to your WSL2 internal IP, and your development servers running inside WSL2 will be inacessable to devices on your local network( i.e smartphones connected to the same WiFi as your PC ), so to remedy this, we will have to setup proxy forwarding.
We first make a firewall rule to allow incoming connections from the Local Network in either CMD or PowerShell running as Administrator, since these steps have to be done on the Windows 10 host.
netsh advfirewall firewall add rule name="Allowing Incoming Local Network connections" dir=in action=allow protocol=TCP localport=4000
The local port can be anything you chose, just be sure to use the same port number in the next command.
We then run this command in the same CMD/PowerShell to forward incoming requests from the IP address 192.168.0.176 with Port 4000 to the localhost with Port 4000, that is your development server.
netsh interface portproxy add v4tov4 listenport=4000 listenaddress=192.168.0.176 connectport=4000 connectaddress=localhost
 I chose
 192.168.0.176 since this is the local IP of my computer, as it is seen by the router, you should put in it’s place whatever is your computer’s local IP address.
Conclusion
We’re at the end of this little guide, hopefully this post has helped you to make a more productive and comfortable workflow using VSCode and WSL2, Where you can focus on doing your coding with minimum distractions regarding tooling, drivers, incompatibilities, dual boot taking up space on your SSD etc.
WSL2/VSCode ended my “distro-hopping” and annoying need to switch into Linux Mint, just to start coding, I now enjoy the best of both worlds, hope you do too :)